While most companies generate a reasonably low scrap level, industries that have highly critical cosmetic part requirements need to put in place special processes to make perfect parts. Simply making a good part is not acceptable. The parts must look “great” in all aspects, from the dimensional to the cosmetic appearance.
Cosmetic issues are in all business segments; consumer, automotive, medical and aerospace. For parts that are molded, techniques have been developed to manufacture molds and handle parts after molding.
For CNC machined parts that require this high cosmetic appearance, Protomatic uses a simple technique for improving processes to create those “great” looking parts.
How does a company ensure reliable products when hundreds of thousands of parts are being manufactured?
Protomatic Inc. shared with us how the company strives to improve yield and stave off increased inspection. The solution is simple to a company like Protomatic: utilize CNC machining in order to improve cosmetic finishes with a systematic method.
Below is an example of a Protomatic customer who was manufacturing parts in-house, and experienced a very high rejection rate. The failures were so high, the customer simply did not want to produce the product. They were looking for a supplier that could produce a higher quality part.
The challenge revolved around the customer needing its washers to have a “nick free” surface, and a surface finish of Ra 16 (Ra = Roughness average in micro inches) or better with a soft metal, after hard coat anodize. A task that is very difficult.
Extreme finish + soft metal + large quantities = BIG CHALLENGE
The washers needed to be hard coat anodized (an electrochemically applied ceramic coating on aluminum based material) which roughens the finish slightly. Protomatic had to manufacture a surface finish of Ra 8, half the smoothness of the finish coated requirement of Ra 16.
The “nick free” requirement was equally as challenging. Creating a nick free part from a cut off operation is very difficult. The light aluminum washer-shaped part literally flies like a Frisbee™ into the parts catcher.
Let’s put it this way, they needed Protomatic’s help!
Finding a solution can either be simple or extreme. In view of these demanding requirements, Protomatic used the following technique to solve the manufacturing problem of achieving a high level of finish with the soft material. To do this, Protomatic focused on the 5 disciplines.
Tools-Metallurgy-Coolants-Filtration-Machine:
The five disciplines encapsulate the coordination of the manufacturing floor activities. Protomatic ensures that the tools in the magazines are set up correctly and have the correct inserts according to the control plan. The company also makes sure the coolants are compatible with the metallurgy of the parts and the machine and its filtration system are up to snuff.
Process Background:
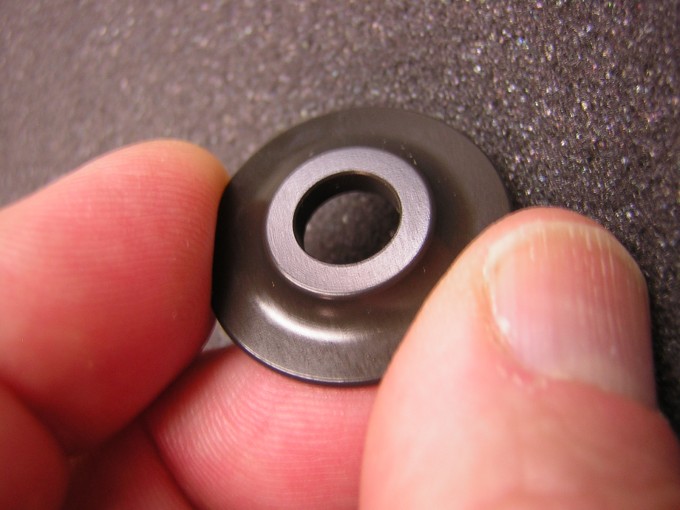
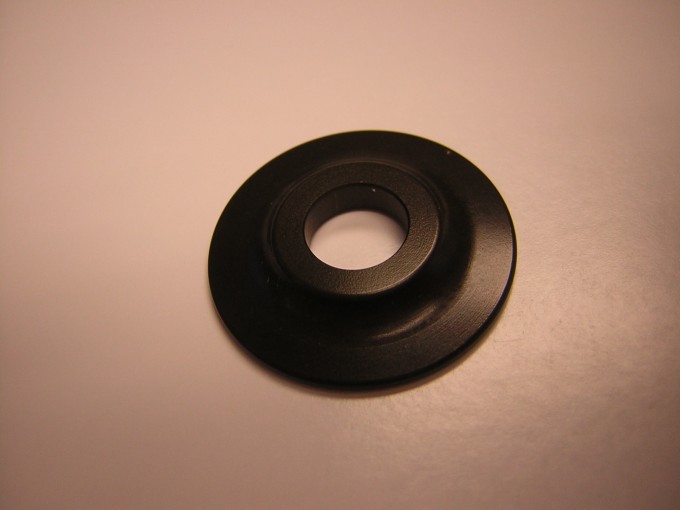
Protomatic’s customer needed a uniquely-shaped, medical grade washer made from 6061-T6 aluminum for use in an OEM medical instrument. The part is made from 1.125” OD stock and the surface finish on the washer face had to meet Ra16 or better after hard coat anodize (ASTM-A-8625 Class III). The customer was in the 70% yield range with a myriad of modes of failure, from surface nicks to simply not achieving a smooth finish. They needed at least 200,000 of these washers each year!
In order to shorten the time needed to re-tool the entire process, Protomatic looked at its own current process, which involves a technique recommended by Machining Efficiencies, Inc.
The technique is referred to as the “9×5” approach. There are nine elements to every machining process and five disciplines on the shop floor that must coordinate for best efficiency.
Here’s how Protomatic applied the process improvement technique:
1. Part Design / Process Design – Keeping in mind that the final surface finish requirement is an Ra16 micro inch after the hard coat anodize, and the anodizing will roughen the final finish, the general rule is to deliver a machined surface finish to the anodizing process of an Ra8 maximum. This is possible, but very close to the limits of many CNC machines. Because of this, everything counts. It is vital to bring out manufacturing tricks to create an almost mirror-like finish on even a simple part.
2. Part Material & Hardness – The grade of aluminum is typically consistent throughout the bar stock. However, Protomatic has encountered inclusions relating to the silicon content. For that reason, Protomatic only purchases aluminum bar stock from one or two very reliable sources, with good material traceability. The grade of aluminum in question is relatively soft, in turn making it difficult to achieve an Ra8 micro-finish and requires good chip formation at the cutting edge.
3. Blank Manufacturing quality – Micro-finish in this soft material makes it sensitive to bar whip, created when an incoming bent bar induces a vibration that is detectable at the main spindle when the bars are long. In this case, there are two solutions; one is to add spindle liners, either metal or urethane, which perform slightly different. The second solution is to shorten the bar stock because shorter lengths reduce the vibration. With less “whipping”, there is less vibration transferred to the collet holding the bar stock, ultimately improving the finish. A 24-inch bar length with a urethane spindle liner will suppress the bar whip, enabling Protomatic to machine the desirable Ra4 surface.
4. Tool Design & Manufacture – Protomatic usually works with one of the leading insert manufacturers to fine tune its process. Insert suppliers help with all the various conditions that are available for inserts. Of course, carbide selection is paramount as geometry, coatings and honed edge finishes influence the final surface finish. Through experimentation, uncoated and highly honed insert finishes were able to create the best surface finish on 6061-T6 aluminum for this turning application. Protomatic also evaluated different speeds, feeds, edge geometries, and edge quality.
5. Fixture Design & Manufacture – This part lends itself to be made on either Protomatic’s Hardinge Conquest T42 or Mazak QTN-200. Both machines have automatic bar feeder systems with specially lined part catchers.
6. Machine Condition Including Coolant Filtration – Protomatic considers the machine condition for vibration signature, torque and horsepower. The company only uses machine tool brands that are reliable and meet these requirements. Coolant selection, flow and filtration all play a part in achieving a beautiful, mirror-like micro-finish.
7. Gauges & Technique – The functional surfaces on the part are machine vision gauged, hard gauged and screened for cosmetic flaws. Parts are inspected again by the customer’s quality systems and assembly technicians to achieve the highest quality possible.
8. Lubricant Chemistry, Condition & Application – Machine coolants are not all the same. For this product, the coolant needed the proper lubrication, stability, insert compatibility, and material compatibility, in addition to human compatibility. Coolants for low surface finish cutting for CNC range in class from Synthetic Oil water mixtures to a 100% cutting oil. When machined, aluminum places most of the heat in the chip, so synthetic oil/water mixtures are preferred by Protomatic’s machinists. During the company’s coolant evaluations, it was obvious that some coolants can easily reduce surface finish from an Ra12 to an Ra6. Modern coolants from reputable suppliers are best for long-term consistency. However, you must make sure coolants are filtered to prevent lines from clogging with small chips.
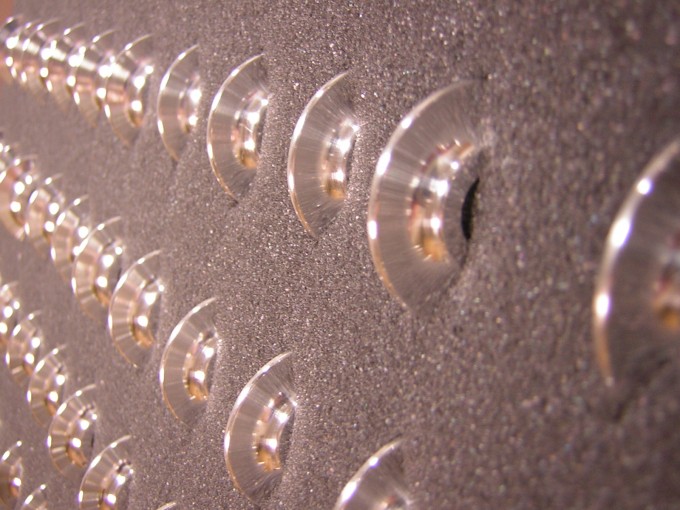
9. The Machinist. Protomatic’s root cause analyst — the completed part must be free from all nicks and burrs with the relatively soft material. To control imperfections, all surfaces that the part contact are softened with dense foam rubber. Each part is visually inspected by Protomatic’s machine operators and then placed in a foam dunnage with individual cavities.
Coated Part:
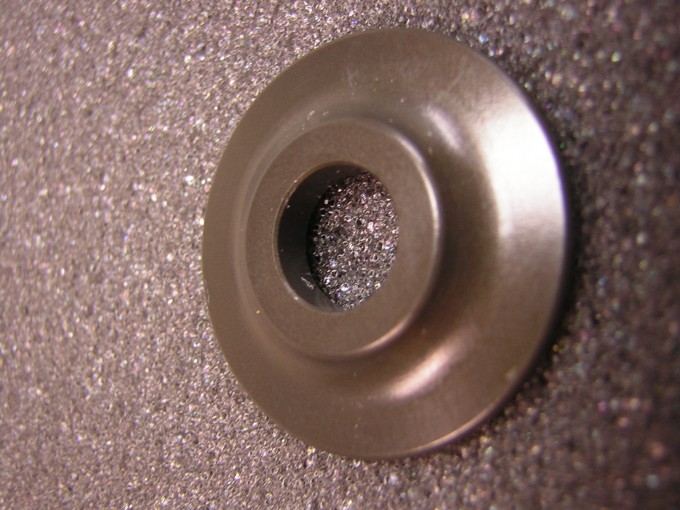
Hard Coated Part:
“We machine soft aluminum parts to a Ra4-6 finish all day and night, keeping our customer pleased, with an ever improving yield focused on ‘Life Saving Precision,‘” said Doug Wetzel, Vice President of Protomatic Inc..
Protomatic is an ISO-9001:2008 and ISO-13485:2003 registered company.

